I have no idea what I'm doing.
But, I wanted to make the mask from Princess Mononoke
I looked around trying to find a good tutorial on how to start but ended up picking some things out that I liked and altering those I didn't (or didn't know how to do well enough). The first decision to be make was that I wanted to mask to look imperfect. My thinking goes that if she lives in the forest, I'm assuming her fabrication skills might be a little lacking and probably wouldn't even care if the edges were perfect.
Some handy things to have:
- Acrylic paint: such as Red
, White
, Yellow
, and Burnt Sienna
. I'm terrible at mixing colors, but these are the ones I used.
- Paperclay
: In the end, I used an entire 16 oz brick and part of a second. Sculpting is not my strength by any means and possibly wasted (or accidently left out) far more than I should have.
- A half sphere of styrofoam
: I used a 12 inch, which seems a little on the large side, so a 10 inch (or even possibly an 8) would work just as easily.
- A big jar of Modge Podge
.
- A heat gun
. This particular one (NTE Electronics ECG HG-300D) doesn't get incredibly hot, but it will get the job done. Plus, I only burned myself once.
- Some type of cling wrap.
- Old newspapers.
- Scissors, knife, bandages, etc.
At first, I had several ideas of how I could go about the project but they didn't really go anywhere. Depending on which scene of the film you're watching, the mask looks more like an elliptical sphere than a perfectly round one. My first thought was to make a rough form out of foam core, fill with expanding foam, then cut out the shape I wanted.
It didn't go very well. At all.
 |
| Lumpy ridiculous blob of coated expanding foam |
So, new plan. This time I would unwrap a 3d model of sphere as a pepakura file, and build the basic form out of EVA foam.
 |
| It was so bad this is the only picture I took before I scrapped the whole idea. |
These pair of failures led me to lean toward the styrofoam sphere base. It's not elliptical, but it still looks pretty good. The first order of business was to cover the sphere in cling wrap to protect the styrofoam from getting anything glued to it. Afterwards, I took the newspapers (cut into 3/4" strips) and began to coat them in Modge Podge before putting them on the sphere.
 |
| Complete layer, let dry, make new layer, let dry, make new layer, etc and so forth. I used a total of six layers, but it still feels a little thin. A few more would have helped. |
Once the sphere was papered and dry, I covered the entire thing (except the inch and a half at the around the bottom that I left as a guide) in a thin layer of paper clay.
As my goal was to keep it a little imperfect, I didn't use any tools except a wet finger to smooth out the biggest bumps. The paperclay will shrink as it dries and I did have a few cracks afterwards but was able to fill them in with additional clay. Once completely dry, I drew on a basic outline of the shapes I wanted.
The next step was to start sculpting the mouth and eye pieces.
 |
| I didn't get the size exactly right to make my pencil out line, but it was smooth and I was afraid further tinkering would only make it worse. Thankfully, paperclay can be sanded to hide screw-ups. |
The eyes were formed sitting on a table, which mean the bottom ended up being flat rather than match the curvature of the mask.
 |
| Due to the gap between the eyes and rest of the mask, I used expanding Gorilla Glue |
Due to a lack of any clamps that would fit all the way around the mask, I tightened a fabric tape around it to hold. Not the best solution, but it did get the job done. The next step was to add the lines around the eyes. I used a 5/8" wide clay strip that was 1/4" tall for both pieces. The four small triangles around the eyes were also cut.

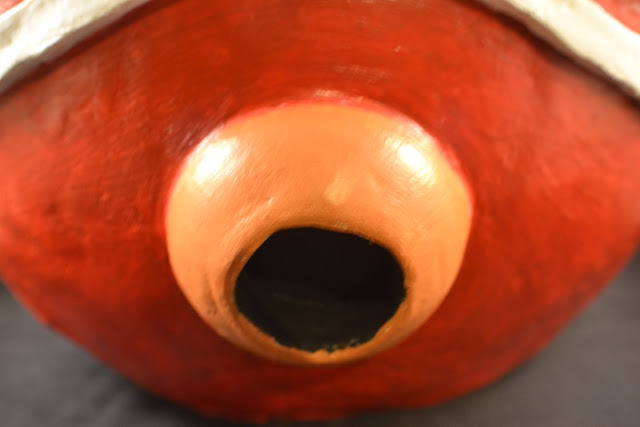
While waiting for the clay to dry, I also started priming the bottom half with white to hide the pencil marks. The eyes and mouth were filled in with a flat black.

After three coats of red, it finally started to look closer to the reference photos. With the bright white under it, the red paint looks much more pink at first.

While waiting for the clay to dry, I also started priming the bottom half with white to hide the pencil marks. The eyes and mouth were filled in with a flat black.

After three coats of red, it finally started to look closer to the reference photos. With the bright white under it, the red paint looks much more pink at first.
After a solid base of red was established, I began mixing more and more brown with each new coat. The get the color the eyes and mouth I started mixing yellow, brown, red, and black until it looked right. The two strips were colored with white.


